
Terminating Shielded Cat6: Four Steps
Quick answer / TL;DR: Short answer: terminate shielded Cat6 in four steps – strip the jacket without nicking the foil, fold the foil back and wrap the drain wire around it or over the connector's shield contact, seat the pairs to the connector's wiring, and crimp with the matching tool. Then verify continuity between the plug shell and the drain at both ends.
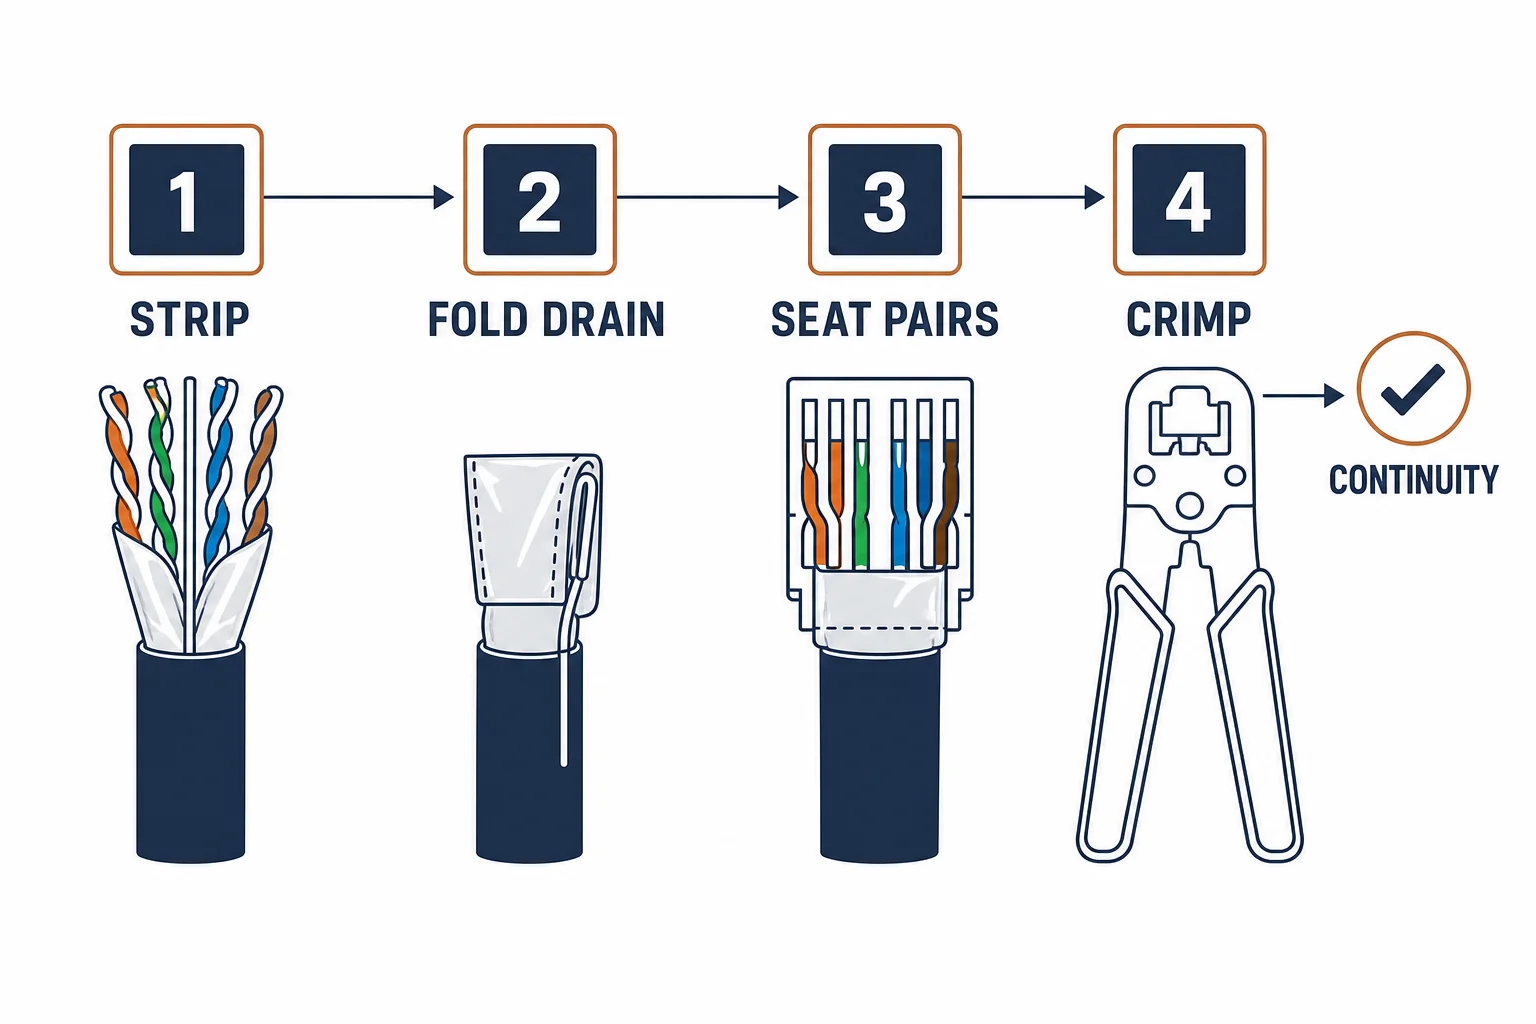
Shielded Cat6 termination fails for one reason most of the time: the foil and drain are handled like an unshielded cable's jacket. The shield needs a deliberate fold, a bonded contact, and a continuity check – four steps that take a minute longer and decide whether the shield works.
This is the termination guide: the four steps, the parts list, and the continuity check that closes the job.
The Four Steps
| The step | The action | The failure it avoids |
|---|---|---|
| 1 Strip | Score the jacket lightly, peel it back | A nicked foil loses its shield function |
| 2 Fold drain | Wrap the drain over the foil, fold back | A stray drain strand shorts a pair |
| 3 Seat pairs | Untwist minimally, seat per T568B | Crosstalk from over-untwisted pairs |
| 4 Crimp | Use the shielded connector's tool | Partial crimp fails the continuity test |
The order is the method: each step protects the next. The drain fold is the step that separates shielded termination from the unshielded habit.
The Parts List
- Shielded RJ45 connectors – the body must accept the cable's diameter and bond the shield
- A crimp tool matched to the connector
- A continuity tester or a multimeter for the shield check
- Cable ties or the connector's strain relief – the shield's bond should not carry the pull
The parts are specific: an unshielded connector on shielded cable terminates electrically but leaves the shield floating – the worst of both.
The Continuity Check
| The check | The method | ||
|---|---|---|---|
| Drain to plug shell | Continuity at each end | ||
| End to end | The shield path through the run | ||
| Pair mapping | T568B continuity on all four pairs | Insulation | No shorts between shield and any conductor |
Standards and Verification
| The reference | The relevance |
|---|---|
| TIA-568.2-D | Termination and grounding practice |
| T568B | The wiring pattern for the pairs |
| Field test | The channel test after termination |
Per-SKU connector designs and tooling are not provided in the knowledge base. The steps are standard practice; follow the specific connector's instructions for the shield bond.
Real-World Applications
The workshop bench
A bench batch of shielded patch leads: the four steps repeated, every lead continuity-checked before it entered the rack.
The field termination
A run terminated on site with the foil nicked at the strip: the shield path broken – the connector re-done, the continuity found.
The unshielded connector mistake
Shielded cable fitted with plain connectors: electrically alive, the shield floating. The batch re-terminated with shielded bodies.
Related reading: The grounding the termination feeds? Read the grounding guide — blogs/news/shielded-cat6-grounding
Related reading: The jack the pairs land on? Read shielded keystone jacks — blogs/news/shielded-keystone-jacks
Frequently Asked Questions
How do you terminate shielded Cat6?
Strip without nicking the foil, fold the drain and foil back, seat the pairs to T568B, crimp with the matching tool, then verify shield continuity at both ends.
Do I need special connectors for shielded Cat6?
Yes – shielded RJ45 bodies that accept the cable diameter and bond the foil. Plain connectors leave the shield floating.
Why does my shielded termination fail the test?
Common causes: a nicked foil, a stray drain strand shorting a pair, over-untwisted pairs, or an incomplete crimp.
How do I check the shield works?
Continuity between the drain and the plug shell at each end, plus end-to-end shield continuity – before the channel test.
Sourcing FTP (F/UTP) Cat6 for a project, a store, or a shielded system? Contact our B2B sales team for shield construction data, category reports, and volume terms – FOB and CIF options available. Request a quote or sample.